
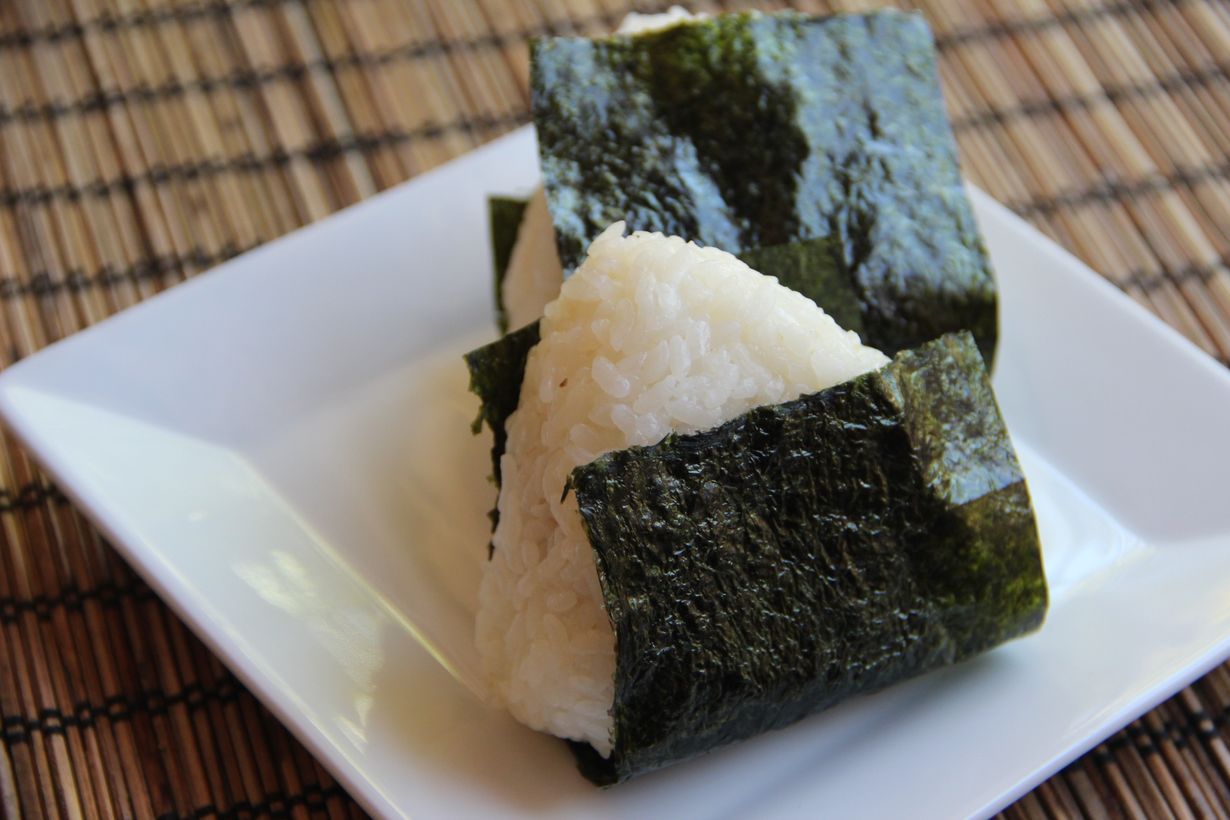
Onigiri, or Japanese rice balls, are a popular and versatile snack in Japan. They are simple to make and can be enjoyed plain or with a variety of fillings. Perfect for lunchboxes or a quick snack, onigiri are both delicious and convenient.
When preparing onigiri, you may need to visit a specialty store or the international aisle of your supermarket for certain ingredients. Japanese short-grain rice is essential for the right texture and stickiness. Nori, or seaweed sheets, are used to wrap the rice balls and add a unique flavor. If you choose to use a filling, canned tuna and mayonnaise are common options.
Ingredients For Japanese Rice Ball (Onigiri) Recipe
Japanese short-grain rice: Essential for the right texture and stickiness.
Water: Used to cook the rice.
Salt: Helps to season the rice and prevent sticking.
Nori: Seaweed sheets used to wrap the rice balls.
Tuna: Optional filling for added flavor.
Mayonnaise: Optional filling to mix with tuna for a creamy texture.
Technique Tip for Making Onigiri
When forming onigiri, make sure to wet your hands frequently with water and sprinkle them with salt. This prevents the rice from sticking to your hands and adds a subtle seasoning to the rice ball. Additionally, when adding a filling, ensure the indentation is deep enough to hold the tuna and mayonnaise securely, but not so deep that the onigiri falls apart. Gently press the rice around the filling to maintain the shape.
Suggested Side Dishes
Alternative Ingredients
Japanese short-grain rice - Substitute with sushi rice: Sushi rice has a similar sticky texture and flavor, making it a suitable replacement.
Japanese short-grain rice - Substitute with arborio rice: Arborio rice is also short-grain and sticky, though it may be slightly creamier.
Water - Substitute with dashi broth: Dashi broth adds an umami flavor, enhancing the overall taste of the onigiri.
Salt - Substitute with soy sauce: Soy sauce can add a deeper, more complex flavor to the rice.
Nori (seaweed) - Substitute with rice paper: Rice paper can be used if you prefer a different texture or if nori is unavailable.
Nori (seaweed) - Substitute with lettuce leaves: Lettuce leaves can provide a fresh, crunchy alternative to nori.
Tuna - Substitute with salmon: Canned salmon offers a similar texture and flavor profile to canned tuna.
Tuna - Substitute with chicken: Canned chicken can be used for a different but still delicious protein option.
Mayonnaise - Substitute with Greek yogurt: Greek yogurt provides a creamy texture with a tangy flavor, making it a healthier alternative.
Mayonnaise - Substitute with avocado: Mashed avocado offers a creamy consistency and adds healthy fats to the filling.
Other Alternative Recipes Similar to Onigiri
How to Store/Freeze Onigiri
Allow the onigiri to cool completely before storing. This prevents condensation, which can make the rice soggy.
Wrap each rice ball individually in plastic wrap. This helps maintain their shape and keeps them fresh.
Place the wrapped onigiri in an airtight container. This adds an extra layer of protection against moisture and odors.
Store the container in the refrigerator if you plan to consume the onigiri within 1-2 days. For longer storage, consider freezing.
To freeze, place the wrapped rice balls in a single layer on a baking sheet. Freeze until solid, then transfer to a freezer-safe bag or container.
Label the container with the date to keep track of freshness. Onigiri can be frozen for up to one month.
When ready to eat, thaw the onigiri in the refrigerator overnight. For a quicker option, use the microwave: unwrap and heat on a microwave-safe plate for 1-2 minutes until warm.
If the nori becomes soggy, you can replace it with fresh strips before serving. This ensures a crisp texture.
For added flavor, consider reheating with a sprinkle of soy sauce or a dash of sesame seeds.
Enjoy your onigiri with a side of pickled vegetables or a bowl of miso soup for a complete meal.
How to Reheat Leftovers
Microwave Method:
- Place the onigiri on a microwave-safe plate.
- Cover it with a damp paper towel to retain moisture.
- Heat on medium power for about 1-2 minutes, checking halfway through to ensure it doesn't dry out.
- Let it sit for a minute before enjoying.
Steaming Method:
- Set up a steamer with boiling water.
- Place the onigiri in the steamer basket, ensuring they do not touch the water.
- Steam for about 5-7 minutes until heated through.
- Carefully remove and let cool slightly before eating.
Pan-frying Method:
- Heat a non-stick pan over medium heat and add a small amount of sesame oil.
- Place the onigiri in the pan and cook for about 2-3 minutes on each side until lightly crispy and heated through.
- Serve immediately for a delightful texture contrast.
Oven Method:
- Preheat your oven to 350°F (175°C).
- Wrap each onigiri in aluminum foil to prevent drying out.
- Place them on a baking sheet and heat for about 10-15 minutes.
- Carefully unwrap and enjoy warm.
Air Fryer Method:
- Preheat your air fryer to 350°F (175°C).
- Lightly brush the onigiri with olive oil to prevent sticking.
- Place them in the air fryer basket, ensuring they are not overcrowded.
- Heat for about 5-7 minutes, shaking the basket halfway through for even heating.
- Let them cool slightly before serving.
Best Tools for Making Onigiri
Rice cooker: Used to cook the Japanese short-grain rice to the perfect texture.
Measuring cups: Essential for accurately measuring the rice and water.
Strainer: Helps rinse the rice under cold water until the water runs clear.
Mixing bowl: Useful for holding the rinsed rice before cooking.
Wooden spoon: Ideal for fluffing and cooling the cooked rice slightly.
Cutting board: Provides a clean surface for cutting the nori into strips.
Sharp knife: Necessary for cutting the nori sheets into strips.
Small bowl: Handy for holding water to wet your hands and sprinkle with salt.
Hands: Used to shape the rice into balls or triangles and to add fillings.
Can opener: Needed if you are using canned tuna for the filling.
Spoon: Useful for scooping the tuna and mayonnaise filling into the rice balls.
How to Save Time on Making Onigiri
Prepare the filling: Mix the tuna and mayonnaise in advance to save time when assembling the onigiri.
Use a rice cooker: Cooking rice in a rice cooker ensures perfectly cooked rice without constant monitoring.
Cool rice quickly: Spread the cooked rice on a baking sheet to cool it faster.
Wet hands: Keep a bowl of water nearby to wet your hands frequently, preventing the rice from sticking.
Pre-cut nori: Cut the nori sheets into strips ahead of time to streamline the wrapping process.
Japanese Rice Ball (Onigiri) Recipe
Ingredients
Main Ingredients
- 2 cups Japanese short-grain rice uncooked
- 2.5 cups Water
- 1 teaspoon Salt
- 4 sheets Nori (seaweed) cut into strips
- 1 can Tuna optional, for filling
- 2 tablespoon Mayonnaise optional, for filling
Instructions
- Rinse the rice under cold water until the water runs clear.
- Cook the rice in a rice cooker with 2.5 cups of water.
- Once cooked, let the rice cool slightly.
- Wet your hands with water and sprinkle with salt to prevent sticking.
- Take a handful of rice and form into a ball or triangle shape.
- If using a filling, make a small indentation in the center of the rice ball, add the filling, and cover with more rice.
- Wrap a strip of nori around the rice ball.
- Repeat with the remaining rice.
Nutritional Value
Keywords
More Amazing Recipes to Try 🙂
- Japanese Crab Omelette Recipe20 Minutes
- Japanese Fried Shrimp Recipe25 Minutes
- Japanese White Bread Recipe50 Minutes
- Japanese Kale Salad Recipe15 Minutes
- Japanese Shiitake Mushroom Soup Recipe30 Minutes
- Japanese Chili Crisp Recipe30 Minutes
- Japanese Tofu Salad Recipe15 Minutes
- Japanese Sesame Cookie Recipe27 Minutes
Leave a Reply